
Tomb of the First Pythia: a developer walkthrough of an Assassin’s Creed Odyssey dungeon
The Tomb of the First Pythia sits east and very slightly north of the Temple of Apollo synchronization point in Phokis, and it is one of the compact “ancient tomb” dungeons that Assassin’s Creed Odyssey uses to teach pressure-plate traps, breakable walls, and stele-based progression. From a production standpoint, the tomb is a useful case study because it is small enough to walk through in under five minutes, but it touches almost every dungeon system the studio built for the game: synchronization distance, encounter spawning, breakable props, spike-trap volumes, and the Ancient Stele objective that gates a region-wide reward. The walkthrough below treats the tomb the way a level designer or QA tester would, separating the actual layout from the gameplay decisions a developer made when assembling the space.
Because the tomb is short, most of the practical value for a developer is in noticing how the systems chain together rather than what to click next. The rooms are built so that a player who ignores the obvious loot path can still complete the stele objective, and a player who rushes the stele path can still find the hidden room. That is not an accident. It is a deliberate funnel shape that the design team uses to make small dungeons feel fair without feeling linear.
What this article covers
- The exact room sequence a developer can read from the geometry, and how each room is laid out to support a specific player behavior.
- The pressure-plate spike trap, the snake encounter, and the breakable-wall puzzle, with the design reason each element exists in this short tomb.
- The Ancient Stele objective and the loot room split, and why the level is shaped so a player can complete either path without failing the other.
- Practical tips for a first-time player, plus the QA-style checks a tester would run to confirm the dungeon is in a working state.
- Frequently asked questions about the tomb’s location, the stele reward, and the traps, with answers grounded in the published level layout.
Where the tomb sits in the world and why the location matters
The Tomb of the First Pythia is positioned east, and very slightly north, of the Temple of Apollo synchronization point. That location choice is not cosmetic. Synchronization points in Assassin’s Creed Odyssey are placed at viewpoints and notable landmarks so that a player who has already climbed a synchronization tower can see the surrounding area and plan a route on the map. Because the Temple of Apollo sits on high ground near the coastline, the tomb is visible from the viewpoint as a small marker on the minimap once the player has synchronized the area.
From a level-design perspective, the proximity to a synchronization point is a deliberate onboarding choice. The team wants a player who is still learning the game’s tomb mechanics to reach the dungeon without crossing a hostile region or fighting a regional boss first. The temple area is broadly accessible, the road is forgiving, and the difficulty curve from the surrounding world into the tomb is gentle. That is why the tomb is one of the first ancient tombs a player will see markers for in Phokis, even though the reward is comparable to tombs in harder regions.
Map and orientation cues
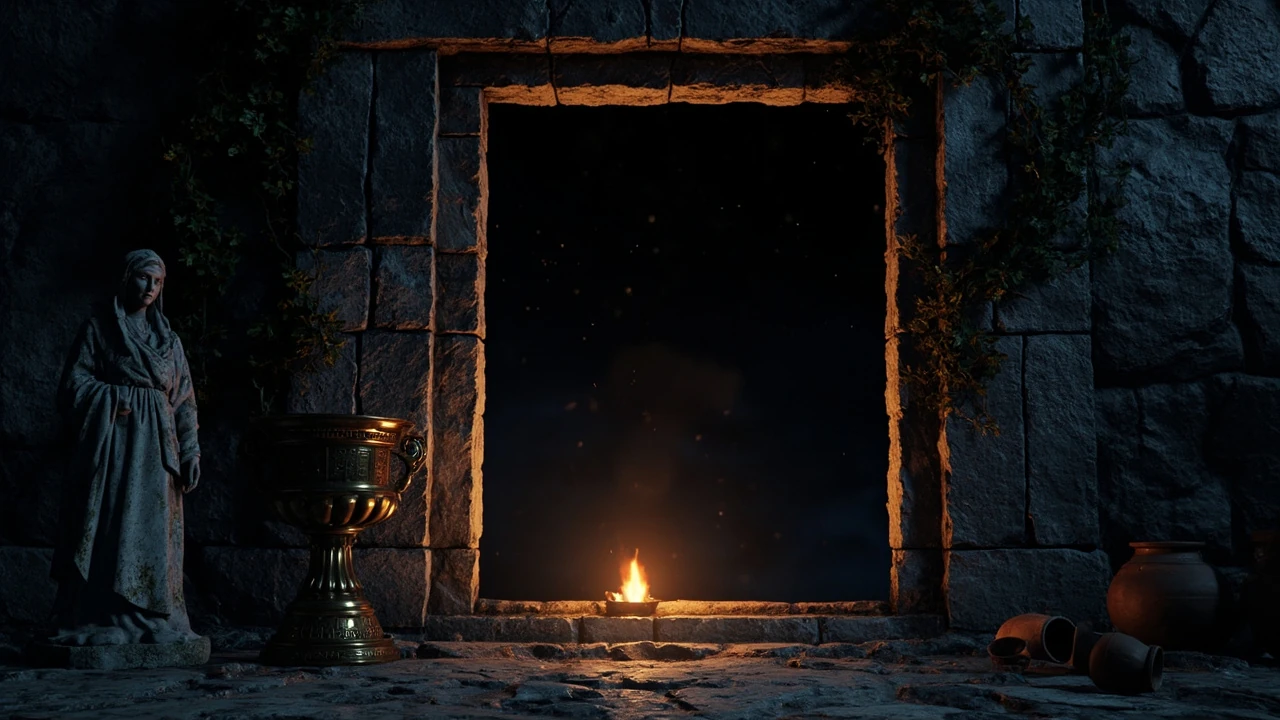
- The entrance is marked by a statue to the left of the doorway, which is a recurring visual signal the developers use for tomb entrances in the game.
- The synchronization tower for the Temple of Apollo gives line of sight toward the tomb, so a player can plan the approach before climbing down.
- The surrounding terrain includes a short downhill path from the main road, which lets the entrance double as a natural viewpoint for the screenshot or photo mode.
Reading the tomb layout like a level designer
Once inside, the Tomb of the First Pythia opens into a small entry chamber. The design here is textbook short-dungeon structure: a short hub, a primary path that leads to the objective, a secondary path that leads to a reward, and a connecting loop that lets the player return to the hub without backtracking through the trap. The room count is small, but each room has a single job.
The first room after the entrance is a forward chamber that contains a statue and a small amount of visible loot. That chamber is the player’s first decision point. Going forward leads deeper into the dungeon and toward the Ancient Stele; turning right at the brazier and ducking under a small opening leads to the next section of the path. The brazier is the visual pivot. Designers use light and heat effects on braziers the same way other games use signage: the player treats the lit area as the path to follow because that is what the engine has trained them to do across the rest of the game.
The level also uses vertical space carefully. The duck-under opening between the first and second rooms forces the player into a crouched state, which slows them down and gives the engine time to load the next encounter. That is a common trick in dungeons built on streaming worlds: a short physical bottleneck creates a natural loading window without a visible loading screen.
Pressure-plate spike trap and snake encounter
Past the duck-under, the path opens into a larger chamber that contains a pressure-plate spike trap and a snake encounter. The room is designed around two parallel lessons: it teaches the player to look down and watch their feet, and it teaches them that enemies in tombs are tied to the same trigger volumes as the traps. In practice, the snakes and the trap share the floor plan, so a player who runs straight through the room will hit one of them and likely both.
The spike trap is a pressure-plate volume, which means the engine checks for the player’s collision shape rather than reading an animation. When the player walks across the volume, the trap fires on a short delay so that the player has a window to react. That delay is part of the difficulty tuning: a longer delay makes the trap a puzzle, a shorter delay makes it a punishment. The team’s choice here is a short delay, which signals that the trap is a hazard the player is expected to learn from rather than a puzzle the player is expected to solve.
The snake encounter sits inside the same room so that the player’s attention is split. A player who watches the floor will get bitten; a player who watches the snakes will step on the plate. The room rewards the player who does both, and it punishes the player who treats the dungeon as a straight run. That is the core gameplay loop the developers want tombs to teach: read the environment, manage attention, and move deliberately.
How the room is built to teach the trap
- The pressure plate is visually distinct from the surrounding floor so a careful player can see it before stepping on it.
- The snakes are placed off the plate itself, so a player who avoids the plate still has to fight or sneak past the encounter.
- The pots the player is supposed to break sit across the room, on the far side of the plate, so a player has to cross the trap to reach the optional loot.
- The exit to the stele room is placed past the encounter, which means the trap and the snakes are the last challenge before the objective.
The hidden room behind the pots and what it teaches about optional paths
Directly across from the entrance to the trap room, on the other side of the spike plate, the level designers have placed a row of breakable clay pots. The pots look like standard ambient props, but they are the wall of a small hidden chamber. Breaking them opens a side room that contains additional loot, including gear the player would otherwise have to find by exploring other tombs or completing other side content.
From a design perspective, the room is a deliberate reward for curiosity. The developers signal the reward by placing the pots where the player can see them while fighting the snakes, but they do not put a quest marker on the room or light it with a brazier. That visual hierarchy is what tells the player the room is optional without telling them to skip it. The same pattern shows up across the game’s other small tombs: a hidden room is always visible from the main path, always behind a breakable prop, and always contains a reward that is good but not best-in-slot.
The chamber itself is short and has no traps. That is a deliberate choice: the developers want the player to associate hidden rooms with safety and reward, not with extra risk. If hidden rooms had traps, players would stop exploring them, and the developers would lose the optional-content funnel that keeps the tomb economy healthy.
Why the pots and not a lever or a key
- Breakable props require no inventory slot, no UI, and no animation, which keeps the path short and the framing cinematic.
- Breakable props are visible from the main path, which is the design signal for optional content in the game.
- Clay pots are a recurring prop across ancient Greek sites in the game, so the visual language is consistent with the world.
- Breaking a pot creates a particle and sound cue that rewards the player immediately, even before they see the loot.
The cracked wall, the Ancient Stele, and the dungeon’s exit loop
After the trap room, the path leads into a hallway that turns right. At the end of the hallway, directly in front of the player, is a cracked wall. The wall is a breakable volume, and breaking it opens into the chamber that contains the Ancient Stele. The cracked-wall pattern is a signature moment in Assassin’s Creed Odyssey tombs. The developers use it to mark the end of a linear path, the payoff for the trap room, and the visual climax of the dungeon in a single beat.
The Ancient Stele itself is a small, decorated stone tablet that the player picks up to complete the dungeon’s main objective. The stele is part of a wider collection system that rewards the player for finding steles across a region. The reward is not the stele itself; it is a separate reward that unlocks once the player has collected enough steles in Phokis. That separation is important. It means the Tomb of the First Pythia is a spoke in a region-wide collection, not a standalone reward. The level designers built the dungeon to be a small, repeatable moment, and the meta-game designers built the collection to give those moments a long tail.
After picking up the stele, the player exits through the same hallway. The room geometry is built so that the player can return to the loot room and the entry chamber without backtracking through the spike trap. That loop is the final design lesson: the developers want the player to leave the tomb feeling that they explored a complete space, not that they retraced their steps through the most dangerous room.
Combat and difficulty tuning inside the tomb
The Tomb of the First Pythia is tuned for a player who has finished the early game and is exploring the Phokis region. The snakes inside the trap room are the only required combat encounter, and they are matched to that level range. The developers use a single enemy type inside the tomb so the encounter reads cleanly. A player who walks into the room with a full adrenaline bar can clear the snakes in a few seconds, and a player who walks in low on resources can still slip past them and focus on the trap.
The difficulty of the spike trap is independent of the player’s level, which is another deliberate choice. Trap damage scales less aggressively than enemy damage across the game, so the trap is dangerous for a low-level player and merely a nuisance for a high-level player. That keeps the room honest for QA: a tester can check the trap’s behavior at a fixed level and trust that the result is roughly representative.
Damage and scaling summary
| Element | Type | Scales with player level | Can be avoided | Failure cost |
|---|---|---|---|---|
| Pressure-plate spike trap | Environmental hazard | Partially | Yes, by stepping around the plate | Health loss, no death in normal play |
| Snake encounter | Living enemy | Yes | Yes, by sneaking or sprinting past | Health loss and adrenaline loss |
| Breakable pots | Destructible prop | No | Optional, the player chooses to break them | None |
| Cracked wall | Destructible volume | No | Required, the player must break it | None |
Loot economy and what the player actually earns
The loot in the Tomb of the First Pythia is split across three locations: the entry chamber, the hidden room behind the pots, and the chamber that contains the Ancient Stele. Each location is tuned to a different reward tier. The entry chamber contains a small amount of common loot. The hidden room behind the pots contains a chest and a chance at a rare drop. The chamber with the Ancient Stele contains a second chest and a drachma pouch. The spread is intentional. The developers want the player to feel that the optional path is worth taking without making the optional path a requirement.
The Ancient Stele itself is not a piece of gear. It is a collectible that contributes to the regional stele reward. That keeps the dungeon’s core reward separate from the player’s power curve, which matters for two reasons. First, the player can run the dungeon at any level without missing a gear reward. Second, the stele reward is shared across the region, so the player has a reason to keep exploring Phokis even after clearing every tomb.
Loot distribution by room
| Room | Loot type | Reward tier | Optional | Design intent |
|---|---|---|---|---|
| Entry chamber with statue | Common loot | Low | Yes | Reward the player for entering and looking around |
| Hidden room behind pots | Chest and rare drop chance | Medium | Yes | Reward the player for noticing and breaking the pots |
| Ancient Stele chamber | Chest and drachma pouch | Medium | No | Mark the dungeon’s main objective with a visible reward |
Step-by-step path: a clean first run
The path below is written for a player who is clearing the Tomb of the First Pythia for the first time, but it is also the path a QA tester would follow to confirm that the dungeon is in a working state. The order of operations matters because some of the rooms are only safe to enter in a specific sequence.
- Approach the entrance from the south or west so the statue on the left of the doorway is visible before the player steps inside.
- Move into the entry chamber and look around. The statue is a visual anchor. The first decision is whether to go forward toward the main path or to spend a moment on the small loot in the entry.
- Turn right at the brazier and duck under the small opening into the next chamber. The opening is the level’s loading hint and the player’s first signal that the dungeon is shaped like a chain of small rooms.
- Enter the trap room. Stop just inside the doorway. Look down to spot the pressure plate and look ahead to spot the snakes. The room is built so both threats are visible from the entrance.
- Cross the trap room by stepping around the pressure plate. If the trap fires, take the hit and keep moving. The trap is not lethal at normal difficulty.
- Deal with the snakes. A heavy weapon or a fire ability will clear the encounter quickly. A player who prefers stealth can crouch past the snakes and ignore the fight.
- Break the pots directly across from the entrance, on the other side of the spike plate. The pots are the wall of the hidden room.
- Enter the hidden room, collect the chest and any gear that drops, and exit back into the trap room.
- On the return from the looted room, make a right to continue on the main path. The hallway leads to a turn and then to a cracked wall directly in front of the player.
- Break the cracked wall, enter the chamber, and pick up the Ancient Stele. The stele completes the dungeon’s main objective and contributes to the regional collection.
- Open the chest in the stele chamber and collect the drachma pouch, then retrace the path to the entrance.
Common failure modes and what a developer checks first
Small tombs in Assassin’s Creed Odyssey have a predictable set of failure modes. The Tomb of the First Pythia is no different. The list below is written from a QA perspective, but it is also useful for a player who has hit a wall and wants to understand whether the problem is the dungeon’s geometry or their own loadout.
- The pressure plate fires before the player reaches the middle of the room. This usually means the player clipped the edge of the volume during the entry animation. The fix is to step back and re-enter the room from the doorway.
- The snakes are aggroed from outside the room. The trigger volume for the encounter is the doorway, not the trap. A player who attacks from the hallway will pull the encounter and take fire while the trap is still active.
- The pots do not break on the first hit. Some weapons have a slower break animation. A heavy weapon or a charged ability is the most reliable way to clear the wall in a single hit.
- The cracked wall does not register as breakable. The wall has a faint crack texture that the lighting can hide. A player who cannot see the crack should approach from the center of the hallway rather than the side, where the texture is more visible.
- The Ancient Stele does not appear in the quest log. The pickup has a short delay. A player who runs past the stele and into the hallway will sometimes see the prompt reappear after a few seconds.
How the tomb compares to other small tombs in Phokis
The Tomb of the First Pythia is one of several small tombs in Phokis, and the team reused the same general pattern across most of them. A typical Phokis tomb has an entry chamber, a trap room with a pressure plate or a fire trap, a hidden room behind breakable props, and a stele chamber at the end of a cracked-wall hallway. The Tomb of the First Pythia follows that pattern closely, which is useful for a player who is learning the genre and for a developer who is studying how the studio ships consistent dungeon content.
The differences between tombs in the same region are usually small. Some tombs swap the spike trap for a fire trap. Some tombs place the hidden room on the other side of the trap. Some tombs add a second hidden room past the stele chamber. The Tomb of the First Pythia is a representative example, which is why it is a good case study for a developer who wants to understand the dungeon’s design vocabulary.
Pattern reuse across Phokis tombs
| Element | Role in the dungeon |
|---|---|
| Entry chamber with statue | Hub and visual signal |
| Brazier pivot | Directional cue for the main path |
| Duck-under opening | Loading window and pacing |
| Trap room with pressure plate | Combat and hazard lesson |
| Breakable pot wall | Optional loot funnel |
| Cracked-wall hallway | Climax and stele chamber entry |
| Stele chamber | Main objective and reward |
Designing for curiosity: why the optional path works
The optional room behind the pots is the part of the tomb that most players will remember, and it is also the part that most clearly shows the team’s design philosophy. The room is not gated by a quest marker, a key, or a puzzle. It is gated by a visual cue, the pots, that the player can choose to investigate or ignore. The team’s bet is that a player who has played the game for a few hours will investigate, because the game has trained them to investigate similar cues in other tombs.
That bet is what game designers call a “curiosity loop.” The player sees a cue, decides to investigate, finds a reward, and is more likely to investigate the next cue they see. The loop is small in the Tomb of the First Pythia, but the same loop is what makes the wider collection system work. A player who investigates every cue in every tomb in Phokis is also the player who will engage with the stele collection, the regional reward, and the side content that the developers want to surface.
The risk of the loop is that a player who ignores the optional room once will ignore it every time. The team mitigates that risk by placing the most interesting reward in the hidden room, not in the main path. The main path’s reward is the stele, which is a small stone tablet. The hidden room’s reward is a chest with a chance at a rare drop. That ordering is what keeps the optional path alive across the entire game.
Player-facing tips that double as design observations
The tips below are written for a player, but each one is also a small observation about how the level was designed. A developer reading the list will recognize the same patterns in other small tombs in the game.
- Approach the entrance from the statue side. The lighting is set up so the statue is visible from a distance, which makes the entrance easier to find in screenshots and in photo mode.
- Treat every brazier as a direction marker. The team’s lighting pipeline uses braziers the same way other games use quest arrows, so a lit brazier is a reliable sign that the main path continues in that direction.
- Watch the floor before you watch the enemies. The pressure plate is the bigger threat in the trap room, and the snakes are a secondary threat. The room is tuned so a player who avoids the plate will also have room to fight the snakes.
- Break the pots even if you do not need the loot. The animation, the sound, and the visual reveal are part of the dungeon’s reward economy, and the developers tuned the encounter around the player who breaks the pots.
- Listen for the cracked wall. The breakable wall has a faint audio cue as the player approaches, which is a deliberate hint that the wall is part of the path rather than a piece of geometry.
- Do not sprint through the hallway. The hallway is short, but the turn at the end hides the cracked wall. A player who slows down at the turn will see the wall in time to break it cleanly.
What a developer can learn from a tomb this small
The Tomb of the First Pythia is useful as a teaching example because it is small, self-contained, and built on a small number of systems. A developer who wants to understand how the studio ships dungeon content can read the tomb in under an hour and walk away with a working mental model of how the team’s level designers think. The lessons are not exotic. They are the same lessons that show up in any well-built short dungeon: a clear entry, a single decision point per room, a trap that teaches the player to read the environment, an optional path that rewards curiosity, and a payoff that loops back to a wider meta-system.
For a small studio, the tomb is also a useful reference for scope. A team of two or three level designers can build a tomb this size in a sprint, and the result will still feel like part of a larger game because the systems behind it are the same systems the studio already uses for the rest of the world. That is the real value of studying a small, well-built dungeon: it shows a team that they do not need a huge level to teach a player something useful.
Frequently asked questions
Where is the Tomb of the First Pythia located?
The tomb sits east, and very slightly north, of the Temple of Apollo synchronization point in Phokis. The entrance is marked by a statue to the left of the doorway, which is the visual signal the developers use for tomb entrances across the game.
What is the main objective inside the tomb?
The main objective is the Ancient Stele, a small decorated stone tablet that the player picks up to complete the dungeon’s primary quest. The stele also contributes to the wider Phokis stele collection, which unlocks a regional reward once enough steles are found.
Is the pressure-plate spike trap dangerous?
The trap deals a moderate amount of damage and is not lethal at normal difficulty, but it is dangerous enough that a player who walks across the plate without expecting it will lose a meaningful chunk of health. The trap is designed to teach the player to read the floor, not to kill them.
Do I have to break the pots for the stele objective?
No. The pots open a hidden room that contains optional loot. The Ancient Stele is in a separate chamber past the cracked wall, and the stele objective can be completed without ever breaking a single pot.
Can I sneak past the snakes in the trap room?
Yes. The snakes are tied to the same trigger volume as the room itself, but a player who crouches and moves slowly can pass the encounter without drawing aggro. Stealth is a supported path, and the developers built the room so that a successful stealth run still completes the stele objective.
What level should I be to clear the tomb?
The tomb is tuned for a player who has finished the early game and is exploring Phokis at the regional level. The snakes scale with the player’s level, and the spike trap scales less aggressively. A player who is significantly under-leveled for the region will still be able to clear the dungeon, but the trap and the encounter will feel more punishing.
Does the tomb reset if I leave and come back?
The dungeon’s enemies and breakable props reset after a short delay once the player leaves the area, but the Ancient Stele does not respawn once it has been collected. The loot chests reset on the same timer as the enemies, so a player who wants a second pass at the optional chest can leave the area and return.
What reward do I get from the stele?
The stele itself is a collectible. The visible reward is a small drachma pouch and a chest in the stele chamber. The larger reward is the regional stele bonus, which unlocks once the player has collected enough steles across Phokis.
Is the cracked wall a required break?
Yes. The cracked wall is the only path to the stele chamber, and the player must break it to complete the dungeon’s main objective. The wall is a destructible volume, not a lever or a key, so any weapon or ability that breaks a prop will open it.
How long does a clean run take?
A first-time player who reads the environment will clear the tomb in about three to five minutes. A player who already knows the layout can clear it in under two minutes, and a speedrunner with a fully leveled build can finish the stele pickup in well under a minute.
Leave a Reply