
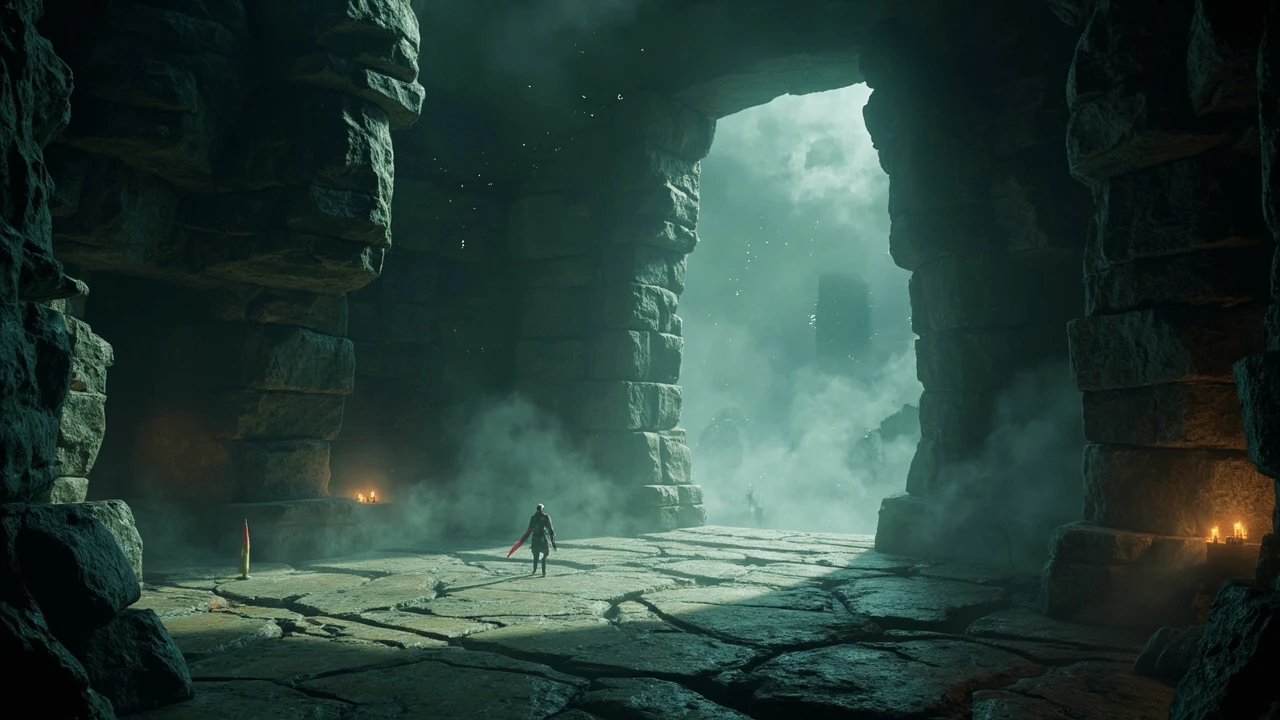
Chromatic ramasseur: where it sits in Expedition 33 and why the parry mechanic matters
The chromatic ramasseur is an optional boss inside the Visages area of Clair Obscur: Expedition 33, tucked just off the main Act 2 path. Most players meet it by accident, drawn in by a giant, sorrowful face that opens into a teleporter and a quiet sub-region built around ranged Nevron enemies. The reason it tends to stall parties is not raw damage: it is that the fight is built around a single parry stun loop. The chromatic ramasseur only gives the player party a real turn when it is stunned, and the simplest way to stun it is to counter its attacks with properly timed parries rather than to grind raw Light damage. The encounter is short in time but heavy in mechanical read time, and a clean kill depends on understanding the arena, the elemental matchup, and how counter-based Pictos and Luminas interact with the parry window.
This guide focuses on that fight in particular. It walks through the route from the first Rest Point in Visages to the boss arena, breaks down the parry-only stun mechanic, and explains how Light-weak and Dark-resistant matchup data should change party and Pictos choices. It also covers what to do if the chromatic ramasseur feels harder than expected, because the most common causes are equipment setup, party ordering, and a misunderstanding of the counter window. None of the guidance replaces playing the fight yourself. Treat the timings as approximations, validate each tip in your own run, and adjust to the build you are running.
One quick note before the route and the build talk: the support for everything below is a single verified reference page on the chromatic ramasseur that walks through its location, the parry gimmick, and the Light weakness in a clean, screenshot-led format. Where this page goes deeper, it stays inside the claims that page can stand behind, and where this page adds interpretation around party order or Pictos priority, it is treated as the kind of advice that still needs to be tested in your own run rather than something handed down by an unnamed authority.
How to reach the chromatic ramasseur in Visages
The Visages area is reached naturally during Act 2 of the main story, so the boss does not require a side quest or a hidden trigger. The tricky part is that the path forks immediately, and one branch leads deep into optional content while the other continues the critical route. The chromatic ramasseur is on the optional branch, which is why many players either skip it or stumble into it unprepared.
From the entry Rest Point in Visages, the path splits almost immediately. The first Rest Point is named Plazza, and it is the last safe decision point before committing to the optional detour. From Plazza, take the second path on the left and follow it forward. The terrain is mostly linear, with Nevron patrols scattered between Rest Points. If your only goal is the chromatic ramasseur, you can run past most of those enemies. There is no requirement to clear the optional corridor before engaging the boss.
Eventually the path opens into a large stone face built into the cliffside. Walk straight into the open mouth. A brief cutscene triggers and the party is teleported to a new sub-region, which has its own internal Rest Point called Sadness Vale, marked by a flag planted by Expedition 39. From that flag, take the left path and follow the ridge down. The chromatic ramasseur patrols a small, enclosed arena at the end of that ridge. The arena is shaped for parry practice: the floor is mostly flat, sight lines are short, and there is room to reposition between the boss’s attack chains.
A useful mental model for the route is to think of Visages as two layers. The upper layer is the main path, which the player is already on when they enter the area, and the lower layer is the optional corridor, which the chromatic ramasseur sits on. The stone face and the Sadness Vale Rest Point are the only two transitions between the two layers, and once the party is past Sadness Vale, the path stops forking. If the party is past the Sadness Vale flag and the path has split again, they have gone too far and missed the boss arena.
Route summary from Plazza to the chromatic ramasseur
| Step | From | Action | Notes |
|---|---|---|---|
| 1 | Plazza Rest Point | Take the second path on the left | This is the optional branch |
| 2 | Optional corridor | Run past Nevron patrols | No clear required to reach the boss |
| 3 | Large stone face | Walk into the open mouth | Cutscene teleports the party |
| 4 | Sadness Vale Rest Point | Take the left path from the Expedition 39 flag | Sadness Vale is a dedicated sub-region |
| 5 | Path from Sadness Vale | Follow the ridge down into a small arena | Chromatic ramasseur patrols the arena |
The table is intentionally short because the route itself is short. Players who get lost on the way to the chromatic ramasseur are almost always lost at step 1, where the optional branch and the main story branch split off Plazza. After the stone face teleport, the path is linear to the boss.
The parry-only stun mechanic explained
The chromatic ramasseur has a gimmick that is not obvious from the encounter intro: the party only gets a turn when the boss is stunned, and the simplest, most reliable way to stun it is to parry its attacks. This is different from the typical Expedition 33 loop, where players can spend a turn on healing, debuffs, or setup. Here, the dominant loop is reactive. You wait for the boss to commit, you parry, and the resulting counter window is where the real damage happens.
Mechanically, the fight has three nested layers.
- Stun gating. The boss’s own turn ends with a stun check, and the party only acts when that stun lands. Trying to brute force a standard rotation between parry windows usually wastes the turn.
- Counter window. A successful parry opens a short counter window. Light-element party members benefit most from this window, because their counter damage carries the elemental weakness.
- Pattern read. The chromatic ramasseur’s moveset is shorter than the Grosse Tete set that many players remember from earlier in Act 2, but the timings are strict. The parry window is generous on the first few attempts and tightens as the encounter progresses.
The parry does not need to be pixel-perfect on the first hit. The first few attacks in the chromatic ramasseur’s pattern are well telegraphed, with a long windup and a clear strike. As the fight goes on, the boss layers follow-ups into the recovery frames, so the parry window shrinks. Players who are used to spamming the parry button will start trading hits. Players who wait for the strike and then commit will keep the counter window consistent.
There is a practical reason the fight is designed this way. A parry-only stun pattern forces the player to learn the boss’s rhythm, and the chromatic ramasseur’s rhythm is short enough to be learnable in a few attempts. The fight is also built so that the recovery state after a clean parry chain is the only reliable damage window, which means raw weapon damage without a counter build ends up feeding the boss’s stun meter slowly. The encounter rewards investment in the mechanic rather than investment in raw stats.
Light weakness, Dark resistance, and party order
The chromatic ramasseur is weak to Light and resistant to Dark. This matchup is more important than the parry mechanic for the long fight, because the counter window is exactly where the elemental hit lands. If the party member that counters is not using a Light weapon, the counter is essentially wasted. If every party member is using a Light weapon, the parry window becomes the primary damage source, and the rest of the fight is just pattern management.
Players running a mixed-element party should reorder the roster so that the active counter attacker is the strongest Light user. The party order also matters for survivability. The chromatic ramasseur’s follow-up chain hits the slot most exposed to its strike arc, so the character with the cleanest parry timing should be in the front. If you have a dedicated support or healer, they can sit in the back slot where the boss’s strikes are less likely to connect, then swap in for a turn during the stun window.
A useful test before engaging the boss is to open the equipment screen and confirm three things: the front-slot character has a Light weapon, the back-slot character is the healer or support, and no character in the active three is using a Dark weapon. If any of those three is wrong, the fight will technically still be winnable, but the parry counter window will lose a meaningful chunk of its damage, and the encounter will take longer than it needs to.
Light and Dark matchup at a glance
| Element | Matchup vs chromatic ramasseur | Effect on parry counter | Effect on direct cast |
|---|---|---|---|
| Light | Weakness | Counter damage amplified, stun build-up faster | Direct casts useful when the stun window opens |
| Dark | Resistance | Counter damage reduced, stun build-up slower | Direct casts mostly wasted on neutral turns |
| Neutral | Neutral | Counter works, no elemental bonus | Direct casts used for utility, not damage |
The Neutral row is included because not every party in Act 2 is built around a single element. A neutral counter build can still clear the chromatic ramasseur, but it will land fewer parries before the first stun and will spend more of the stun window doing setup rather than burst. The matchup table is a way of saying that the element on the counter weapon is doing as much work as the counter passive slots are.
Building the right Pictos and Luminas loadout
Because the chromatic ramasseur’s stun is gated on the parry counter, the most valuable passive slots are the ones that boost counter damage, break build-up, and parry timing. Pictos and Luminas that focus on raw weapon damage are useful during the stun window, but they do nothing to help the parry itself. Players who tried to brute force the encounter with a generic damage build often describe the fight as endless, because their counters land but their counter damage is too low to push the stun meter before the boss’s next chain.
Useful loadout categories for this fight, in rough priority order:
- Counter-focused slots. Anything that increases counter damage, counter hit rate, or counter critical chance is a direct multiplier on the parry window.
- Break-focused slots. Break build-up and break damage help close the gap when the parry window is short and a single counter is not enough to stun.
- Parry timing slots. Slots that widen the parry window or shorten recovery reduce the number of traded hits, which is the single largest source of attrition in the fight.
- Light affinity slots. Slots that boost Light damage, Light resistance penetration, or party-wide elemental matching make the stun window itself end faster.
It is worth being honest about the trade-off. A counter-and-break-heavy build tends to be fragile outside the parry window. If the player misses a parry, the next hit is going to land hard. The fight rewards preparation, not improvisation. Players who want to optimise should also check that their Pictos and Luminas are actually slotted, not just unlocked, and that the matching Light weapon is equipped on the counter character rather than the support character.
One more practical note on loadouts. The chromatic ramasseur is not a long fight once the parry chain is clean, which means long-cooldown burst Pictos are usually wasted on the encounter. The slots that pay off are the ones that fire every chain, not the ones that fire once and then sit on cooldown. Players who are deciding between two Pictos for the same slot should pick the one that triggers on counter or on parry, even if its raw damage number is lower, because the trigger condition is what makes the slot fire during the fight.
Reading the chromatic ramasseur’s attack chain
The boss’s pattern is short compared with the multi-phase structure of some other Expedition 33 encounters, which is part of why the fight is described as learnable. The full chain is roughly three attacks long, with a variable follow-up window before the boss returns to idle. Each attack has a clear telegraph, and each one ends in a strike that the parry system is tuned to catch.
The first attack is a wide horizontal sweep. The telegraph is the boss’s raised arm and a slight pivot to one side. The strike hits roughly a 180-degree arc, and the parry window is the longest of the chain. The second attack is a thrust, slower to wind up, with a longer reach but a narrower arc. The third attack is a follow-up overhead that only fires if the player successfully parries the first two. The parry window on the third attack is the shortest of the chain, which is why players who are learning the fight feel pressure as the encounter progresses.
Once all three attacks are parried, the chromatic ramasseur enters a recovery state. The recovery animation is the moment the stun window opens, and the party gets its turn. The simplest mistake to avoid is trying to push extra damage during the chain itself. The boss’s recovery frames after a missed parry are short, and a player who is still locked into an attack animation will not have time to reposition before the next swing.
For an outside reference that walks through the same parry chain in screenshot form, the verified walkthrough on the chromatic ramasseur covers the attack order, the parry window, and the recovery state with the same fight plan. It is worth opening alongside this page if the chain is not clicking on the first few attempts, because the visual order of the chain is easier to confirm from a screenshot than from a written description.
Why the fight feels harder than it is
Most of the difficulty in the chromatic ramasseur encounter is a setup problem, not a raw-skill problem. The encounter punishes a generic Expedition 33 rotation, because the fight does not give the player the standard turn structure. The clearest diagnostic for a stalled run is to count how many parries the player is landing per stun window. If the count is one or fewer, the problem is almost always equipment and party order, not reaction time. If the count is two or more, the problem is usually positioning or pattern read.
A short checklist to validate the setup before the attempt:
- The front-slot character has a Light weapon equipped.
- The active counter attacker is the strongest Light user in the party.
- Counter-focused Pictos and Luminas are actually slotted on the counter character.
- At least one Break-focused passive is slotted to compensate for missed parries.
- Healing and utility characters are in the back slots where the boss’s arc does not reach.
If the setup checks out and the fight is still rough, the next thing to look at is the parry window itself. The chromatic ramasseur does not have a hidden second phase, but its pattern shortens the parry window as the fight progresses, so a player who lands the first three parries cleanly will often find the fourth one slipping. The cleanest fix is to slow the rhythm down: wait for the telegraph, then commit, rather than trying to keep the same tempo as the first chain.
Positioning, arena geometry, and the Rest Point loop
The arena is small enough that positioning is less about kiting and more about staying inside the counter window. The boss rarely moves far from the centre of the arena, and the recovery animation always faces a consistent direction. Players who try to circle-strafe during the chain tend to lose the parry angle, because the boss’s strike arcs do not rotate with the player. The cleaner pattern is to stand slightly off-centre, in the same spot relative to the boss, and let the arcs come to you.
There is a dedicated Rest Point at the Sadness Vale flag just outside the arena, which means the fight can be reset without losing progress in the surrounding area. The chromatic ramasseur itself does not have a mid-fight checkpoint, so a failed attempt is a full reset. That can make the encounter feel more punishing than it actually is. Players who are learning the parry timings should expect to spend more attempts on this boss than on a generic Expedition 33 optional, and that is normal.
The arena also has a few small terrain features that matter for positioning. The flat floor keeps the parry angle consistent, but the edges of the arena clip into the boss’s strike arc on the second and third attacks of the chain, which is why a player who has been pushed to the edge by a previous swing is more likely to trade hits on the next attack. The cleanest position is slightly off-centre, with enough room on both sides to step back into a parry without crossing the boss’s idle line.
What to do if a parry misses
The chromatic ramasseur’s follow-up damage is meaningful, but it is not one-shot on most builds, and the arena has enough room to recover. The most important thing after a missed parry is to avoid panic-rolling into the next attack. The boss’s chain has short gaps, and a roll that overshoots will often end up in the strike arc of the next attack. The cleanest recovery is to back off until the boss returns to idle, then re-enter the parry rhythm from the first attack of the chain.
Healing and buffing during a miss is sometimes necessary, but it should be done on the recovery turn, not during the boss’s chain. The chromatic ramasseur’s chain is short enough that a single back-off is usually enough to reset the position, and the next parry window is what matters for stun build-up. The fight rewards staying in rhythm. A clean parry is worth more than a clutch heal.
There is also a smaller mistake that comes up after a miss: trying to parry the next attack immediately. After a missed parry, the boss’s next attack has a slightly different timing than the equivalent attack in a clean chain, because the recovery animation is shorter. Players who are used to a fixed rhythm will mistime the next parry. The fix is to wait for the full telegraph before committing, even if the boss feels faster than expected.
Party roles during the stun window
Once the chromatic ramasseur is stunned, the party gets a real turn, and that turn is where the encounter is actually won. The stun window is short, so the party should plan its turn order around burst rather than setup. The front-slot Light character should be the one to spend the turn on raw damage. The back-slot support should not be trying to apply a long buff chain. The cleanest pattern is damage, damage, optionally a small heal, and then re-enter the parry rhythm.
For a deeper breakdown of how party order and Pictos selection interact across Expedition 33 encounters, the site’s guide on character design and party composition analysis walks through the same principles on a different subject, and the principles translate well: front slot for the counter attacker, back slot for support, and passive slots that match the encounter’s main mechanic rather than the player’s favourite generic build.
A small detail that often gets missed in the stun window is which character is acting when. The party order in Expedition 33 is read left to right, and the stun window does not reset the order. If the support character is in the back slot and acts before the front-slot counter attacker, the support will spend the turn on a long buff chain that the counter attacker cannot benefit from. The fix is to set the party order so that the counter attacker acts first in the stun window, with the support acting last.
Common mistakes and how to avoid them
Even with a clean setup, the chromatic ramasseur has a small set of mistakes that come up consistently across runs. The first is trying to use Dark-element skills on a Dark-resistant boss. The second is reordering the party so that the strongest Light user is in the back slot. The third is treating the parry as a panic button rather than a timed input. The fourth is spending the stun window on setup rather than burst. None of these are fatal on their own, but together they turn a learnable encounter into a wall.
For players who are running a generic Expedition 33 build and want to know whether the chromatic ramasseur is worth retooling for, the answer depends on the rest of the build. If the party is already running counter-focused Pictos, the change is small: equip a Light weapon, reorder the party, and re-enter the fight. If the party is running a raw-damage build, the retool is more significant, but the chromatic ramasseur is one of the better encounters in Visages to learn the counter-and-break playstyle, because the pattern is short and the arena is small.
How the chromatic ramasseur compares to other Act 2 optional bosses
The chromatic ramasseur sits between the Grosse Tete encounter, which many players remember for its long parry chain, and the smaller optional Nevron duels scattered around Visages. Compared with Grosse Tete, the chromatic ramasseur is shorter in pattern length but stricter on timing. Compared with the smaller Nevron duels, it rewards counter-focused passives more heavily. The encounter is a useful bridge: it teaches the parry-only stun pattern in a small arena before players hit the more layered optional fights deeper in the optional corridor.
For a broader sense of how optional encounters in Expedition 33 are typically designed and how party composition choices cascade, the site’s guide to optional regions and party setup covers the same design philosophy from a different angle, and the parallel is worth keeping in mind: optional encounters in Expedition 33 are usually more mechanically focused than the main path, and a party that pivots to the encounter’s mechanic is almost always faster than a party that tries to brute force the encounter with raw damage.
Pre-fight checklist for the chromatic ramasseur
A clean run starts before the boss is even engaged. The following list is the minimum setup the encounter expects, and skipping any of these items is the most common cause of a stalled run.
- Light weapon equipped on the front-slot character.
- Dark-element skills left on the bench for this encounter.
- Counter-focused Pictos and Luminas slotted on the counter attacker.
- At least one Break-focused passive slotted as a safety net.
- Healer or support character in the back slot, ready to use the stun window for burst support rather than long buffs.
- Rest Point at Sadness Vale used to top off the party and reset Pictos cooldowns before the attempt.
The chromatic ramasseur is a learnable encounter, and the path to a clean kill is mostly preparation. Players who are willing to spend the time on a single setup pass usually clear the fight in two or three attempts. Players who try to clear it on a generic build often clear it eventually, but at the cost of consumables and time that they would rather spend on the rest of the optional corridor.
Frequently asked questions
Where is the chromatic ramasseur located in Expedition 33?
The chromatic ramasseur is an optional boss found inside the Visages area, just off the main Act 2 story path. From the Plazza Rest Point, take the second path on the left, walk into the open mouth of the giant stone face, and follow the new path to the Sadness Vale Rest Point. From the flag at Sadness Vale, the left path leads to the boss arena.
Do I have to clear the optional Nevrons in Visages to reach the boss?
No. The optional corridor between Plazza and the giant stone face is full of Nevron patrols, but the chromatic ramasseur is the only encounter required to reach the boss. You can run past the other enemies if your only goal is the optional fight. If you want to clear the corridor anyway, the same location walkthrough describes the path clearly, and the surrounding area is consistent with the rest of Visages.
What is the chromatic ramasseur’s main gimmick?
The gimmick is a parry-only stun loop. The party only gets a real turn when the boss is stunned, and the cleanest way to stun it is to parry its attacks. Direct damage outside the parry counter window is largely wasted, which is why counter-focused Pictos and Luminas are so important for this encounter.
Is the chromatic ramasseur weak to Light or Dark?
The chromatic ramasseur is weak to Light and resistant to Dark. Light-element party members benefit most from the counter window, because their counter damage carries the elemental weakness. Dark-element skills should be left on the bench for this encounter, because direct casts will be reduced and counter damage from Dark users will not push the stun meter efficiently.
Which party member should counter the chromatic ramasseur?
The strongest Light user in the party should be the counter attacker, and they should be in the front slot. The back slot should be reserved for the healer or support character, who can step in during the stun window for a burst turn rather than a long buff chain.
How many parries does it take to stun the chromatic ramasseur?
There is no fixed number, because the stun build-up depends on the counter damage of the active party member and the strength of the Light matchup. A party running counter-focused passives and a Light weapon will usually land the first stun after two or three clean parries. A party running a generic build will often need several more parries, and will sometimes fail the encounter entirely if the parry window shrinks before the stun lands.
Can I skip the chromatic ramasseur and still progress the story?
Yes. The chromatic ramasseur is an optional boss and is not required for the main Act 2 story. Skipping it means losing the rewards and the practice against a parry-only stun pattern, but it does not block the main path. The encounter is worth doing if you want to learn the counter playstyle, and it is safe to skip if you are returning to the area later with a stronger build.
What Pictos and Luminas work best against the chromatic ramasseur?
Counter-focused, Break-focused, and Light-affinity slots are the most efficient. Slots that boost counter damage, counter hit rate, and break build-up are the most direct multipliers on the parry window, and a single Light-affinity slot can shorten the stun window significantly. Slots that boost raw weapon damage are useful during the stun window but do not help the parry itself.
Is the chromatic ramasseur harder than Grosse Tete?
Different, rather than harder. Grosse Tete has a longer pattern and rewards patience across a long parry chain. The chromatic ramasseur has a shorter pattern but a tighter parry window, especially as the fight progresses. Players who cleared Grosse Tete by being patient will usually clear the chromatic ramasseur quickly, and players who are still learning the parry timing will find the chromatic ramasseur a more compact place to practise.
What should I do if I keep trading hits with the chromatic ramasseur?
Slow the rhythm down. The chromatic ramasseur’s parry window shrinks as the fight goes on, and players who try to keep the same tempo as the first chain will start trading hits. Wait for the telegraph, commit to the parry, and let the counter window handle the damage. If trading hits continues, check that the counter attacker has a Light weapon equipped and that the party order has the strongest Light user in the front slot.
Leave a Reply